The Linux Command Line Interface (CLI)
Learning Goals
Goals for this week's lab
- Get to know the Linux Command Line Interface (CLI)
- Understand its importance
- Learn basic commands for
- Navigation
- Remote access
- Networking-related tasks
- Understand basic virtualization principles
General Overview
The preparations for this unit consist of three parts
- Practical:
- Setting up the necessary programs to connect to the Virtual Machines (VM) that we'll use in this and upcoming labs, and
- Trying out the commands from readings and videos on your own machine
- Reading up on background information about the command line and some basic functions
- Watching a few videos showcasing the use of those basic commands
Tip
You can complete these parts in any order you prefer, but we suggest setting up your own environment first and experimenting with the commands on your own machine as they come up in the videos and readings.
1) Practical
Setting up a Local CLI Environment on Your Own Machine
- If you're using MacOS or a Linux distribution, you can summon a CLI environment by launching the Terminal app or your distribution's equivalent thereof.
- For Windows users, we suggest setting up the Windows Subsystem for Linux (WSL) (if you're on an older version of Windows, check these instructions) which will allow you to run a Linux command line on your Windows machine.
- When launching the Ubuntu app for the first time, you'll be prompted to create a (local) user account. After picking a name and password of your choice, you'll be in a Linux CLI environment.
- Future references to opening a terminal mean opening the Ubuntu app in your case.
- Note: the home directory of your new user will be empty initially, but you can navigate to your regular Windows user folder by typing
cd /mnt/c/Users/yourusername.
Connecting to the Remote Lab Virtual Machine (VM)
To reduce the load on your personal machines and give all groups a consistent experience, you will connect to virtual machines that run in NTNU's Skyhigh OpenStack cluster. You can get a quick summary about what VMs are in the following video. The figure below shows a brief overview of components and connections.
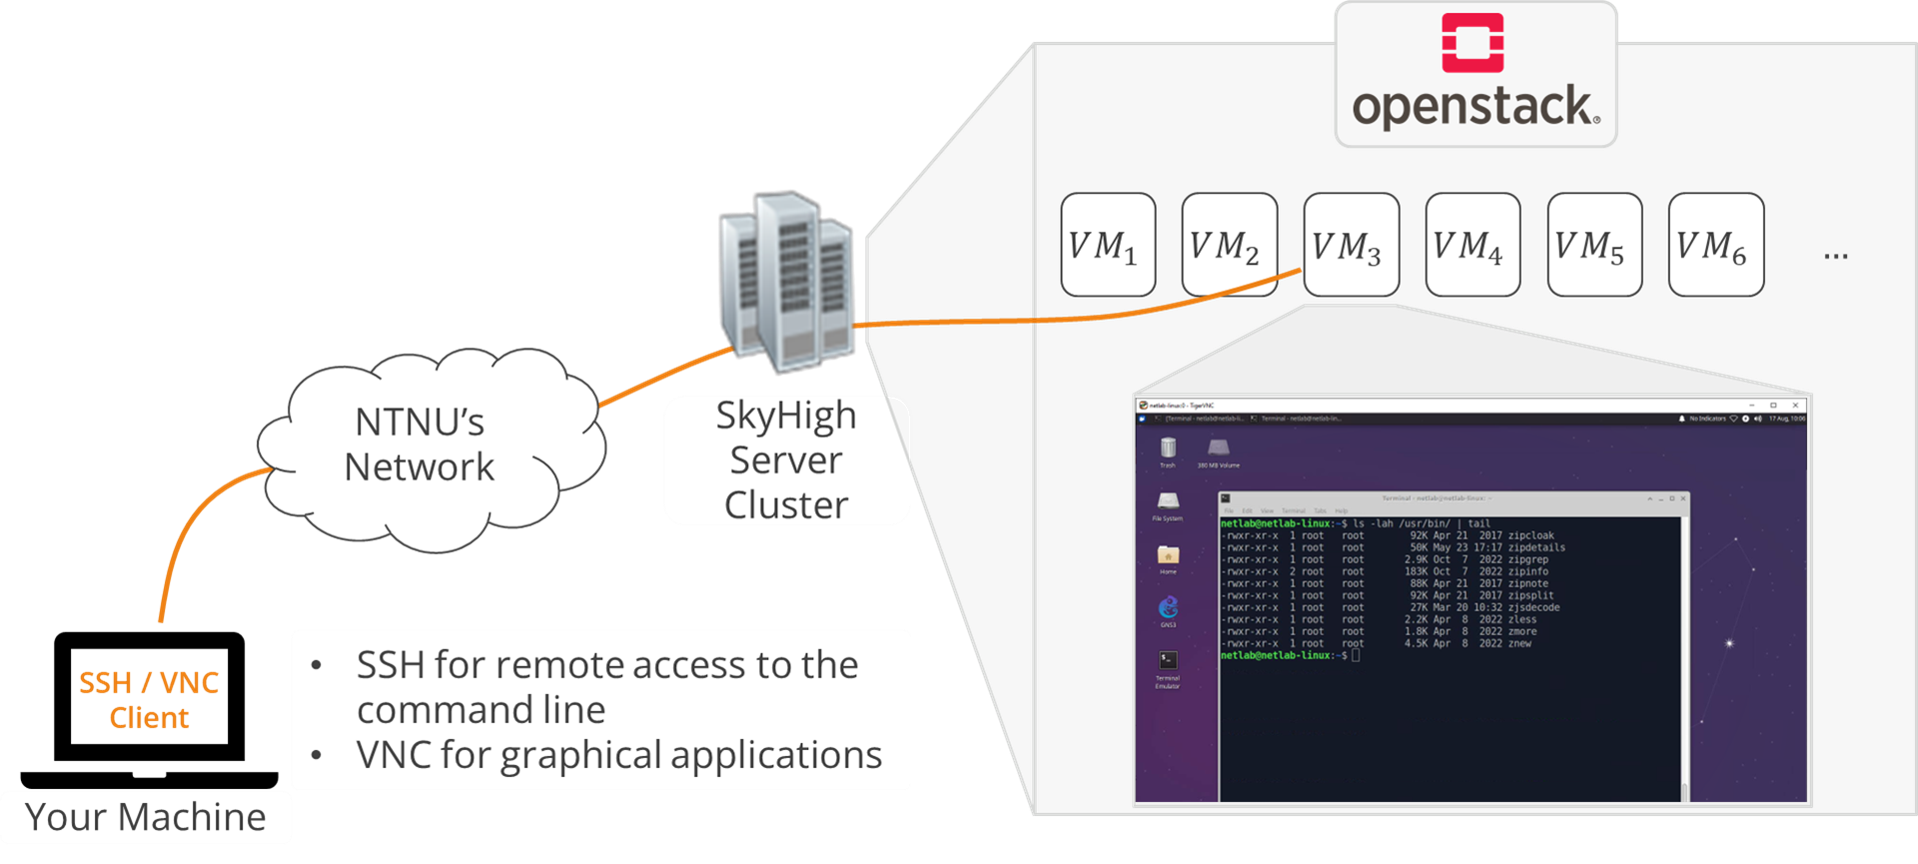
We can connect to remote (virtual) machines either via SSH if we only want to use the command line, or with tools such as VNC to also launch graphical applications.
Tip
You need to be in the NTNU network to connect to the VMs. This is automatically the case if you are on campus and using the eduroam WiFi. Otherwise, you can use the NTNU VPN service to connect to the NTNU network first.
Verifying that an SSH Client is Installed
MacOS and nearly all desktop Linux distributions come with an SSH client preinstalled and hence require no further installation. If you followed the installation of WSL above, the Ubuntu environment will also provide you with an SSH client. You can verify the availability of an SSH client by opening a terminal and typing ssh -V. Below, you can find the expected output for different platforms.
# WSL / Linux
stas@DESKTOP [~]
-> % ssh -V
OpenSSH_8.2p1 Ubuntu-4ubuntu0.9, OpenSSL 1.1.1f  31 Mar 2020

# On a Mac
stas@stas-mbp [~]
-> % ssh -V
OpenSSH_9.0p1, LibreSSL 3.3.6
Connecting via SSH
On the day of the lab, you will receive a Uniform Resource Locator (URL) that will allow you to connect to your team's VM thorugh a terminal.
If you want to connect using SSH, you can open a terminal and type in ssh <user>@<ip>, replacing <user> with your NTNU username and <ip> with the URL from your credentials. The URL will automatically be resolved to an IP address through the NTNU Domain Name System (DNS). You will then be prompted to provide the password for your NTNU user.
After a successful authentication, you proceed to a command line environment on the remote VM where you can execute commands. Afterwards, you can quit the session by writing exit or hitting Ctrl+D on your keyboard. The output of a short example session is provided below. Notice how the beginning of the command prompt changes to <your username>@team<team number + letter>:~$ after connecting, indicating that you are logged in as the user corresponding to your username on a host called team<team number + letter>.
stas@DESKTOP [~]
-> % ssh stanisll@team1A.ttm4175.iaas.iik.ntnu.no
stanisll@team1A.ttm4175.iaas.iik.ntnu.no's password:
Welcome to Ubuntu 24.04.4 LTS (GNU/Linux 6.8.0-137-generic x86_64)

 * Documentation:  https://help.ubuntu.com
 [...]
stanisll@team1A:~$ ls
Desktop  Documents  Downloads  GNS3  Music  Pictures  Public  Templates  Videos
stanisll@team1A:~$ exit
logout
Connection to team1A.ttm4175.iaas.iik.ntnu.no closed.
stas@DESKTOP [~]
-> %
Setting up GNS3
While the CLI environment will be sufficient to complete the first lab, we will also benefit from visualizing the network topology in a program with a graphical interface starting from week 35. We will use the GNS3 network emulator for this purpose.
Downloading GNS3
Firstly, you will need to download and install GNS3 to your local computer:
Enable Port Forwarding
- Before doing anything inside of the GNS3 application, you will need to setup port forwarding to ports which are used by GNS3. Open a new terminal on your local computer, or in the WSL for Windows users, and edit the
~/.ssh/configto have the following text:
Host ntnu_server
  HostName team<your_team_number_and_letter>.ttm4175.iaas.iik.ntnu.no
  User <your_NTNU_username>
  LocalForward 3080 localhost:3080
  LocalForward 5000 localhost:5000
  LocalForward 5001 localhost:5001
  LocalForward 5002 localhost:5002
  LocalForward 5003 localhost:5003
  LocalForward 5004 localhost:5004
  LocalForward 5005 localhost:5005
  LocalForward 5006 localhost:5006
  LocalForward 5007 localhost:5007
  LocalForward 5008 localhost:5008
  LocalForward 5009 localhost:5009
  LocalForward 5010 localhost:5010
  LocalForward 5011 localhost:5011
  LocalForward 5012 localhost:5012
  LocalForward 5013 localhost:5013
  LocalForward 5014 localhost:5014
  LocalForward 5015 localhost:5015
  LocalForward 5016 localhost:5016
  LocalForward 5017 localhost:5017
  LocalForward 5018 localhost:5018
  LocalForward 5019 localhost:5019
  LocalForward 5020 localhost:5020
  LocalForward 5021 localhost:5021
  LocalForward 5022 localhost:5022
  LocalForward 5023 localhost:5023
  LocalForward 5024 localhost:5024
  LocalForward 5025 localhost:5025
  LocalForward 5026 localhost:5026
  LocalForward 5027 localhost:5027
  LocalForward 5028 localhost:5028
  LocalForward 5029 localhost:5029
  LocalForward 5030 localhost:5030
  LocalForward 5031 localhost:5031
  LocalForward 5032 localhost:5032
  LocalForward 5033 localhost:5033
  LocalForward 5034 localhost:5034
- This is just an arbitrary number of ports which GNS3 may use at some point. You may require only a few of them, or you might need even more. In that case, add more lines to your SSH configuration file.
Tip
You can now SSH to your VM by just using the command ssh ntnu_server and your password. The username and IP address, or in our case the URL, will now be filled out for you based on what you wrote in the ~/.ssh/config file.
Update GNS3-Server
-
Check the version of GNS3-Client on your computer:
- Open GNS3 on your local computer.
- Locate "Running GNS3 version x.y.z" in the console.
- Take note of the version number, i.e. "x.y.z" from above.
-
Check the version of GNS3-Server on the VM:
- Connect to the VM with the command
ssh ntnu_server, and use your NTNU password when prompted. - In the terminal of your VM, enter the command
gns3server -v. - Compare with the client version.
- If the version numbers are identical, you may skip to the next subsection (Configure GNS3 Client).
- Connect to the VM with the command
-
If the GNS3-Client version is newer than GNS3-Server:
- In the terminal of the VM, enter the command
sudo apt update && sudo apt install --only-upgrade gns3-server. - Continue to the next subsection (Configure GNS3 Client).
- In the terminal of the VM, enter the command
Configure GNS3 Client
-
Open the GNS3 application on your computer and configure your local GNS3 installation:
- Locate: Edit -> Preferences -> Server (Or Controller)
- Untick Enable local server
- Protocol: HTTP
- Host: localhost
- Port: 3080 TCP
- Untick Auth
-
Reconnect to "ntnu_server", such that the open ports take effect. Make sure that GNS3 connects to your VM under Servers Summary.
-
When opening GNS3 you will be prompted to make a new project. Based on what future tasks require, you can either create an empty project or open a project from the project library.
2) Introduction to the CLI and Documentation of Important Commands
- A tutorial introduction to the Unix command line
- The introduction of Chapter 1 along with Sections 1.1, 1.2, and 1.4 (boxes and exercises are optional at this point) provides a broad overview into the topic.
- Commands for getting help: how to use the
manandaproposcommands to get help and information directly on the command line.
3) Videos on Basic Commands for Interacting with Files (Navigation, Manipulation, Search)
An introductory series on basic commands you'll use in the command line environment.
- File system navigation and inspection (
cd,ls, ..)
- File system manipulation (
cp,rm, ..)
- Search and match inside files using
grep. Note: the first five minutes are sufficient at this stage.
- Printing file contents using
cat
- Getting help with
man
Additional Resources
- Unix/Linux Command Reference: handy overview of many commonly used commands and options.
- explainshell.com: online tool that parses a given command and provides details on the command itself as well as the provided options / flags / arguments.