Networking I - Binary, IP Addresses, Subnets, LAN Configuration
The overall goal of this lab is to consolidate knowledge on IP addressing and subnets. This will be achieved using available networking tools in Linux to manage a simple network in the GNS3 emulator.
After this lab you will be able to
- Understand and apply basic binary arithmetic
- Understand IP addresses and their organisation into subnets
- Create and configure Local Area Networks (LANs)
- Use basic Linux commands for managing:
- IP addresses (IPv4 and IPv6)
- IP subnets and masks
Launching GNS3 and Creating a Basic Network
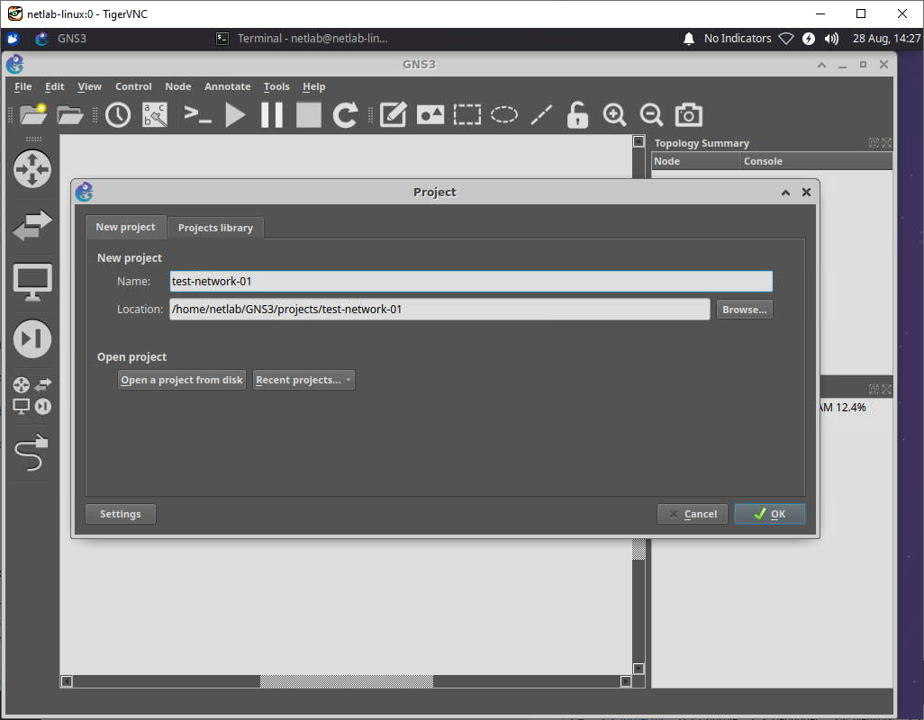
In today's lab, we're going to use the GNS3 network emulator which is already pre-installed on your VMs. This tool allows us to easily and visually create networks whose components we can configure by accessing their respective command line interface. After connecting to your VM, launch the GNS3 program from the desktop and create a new empty project.
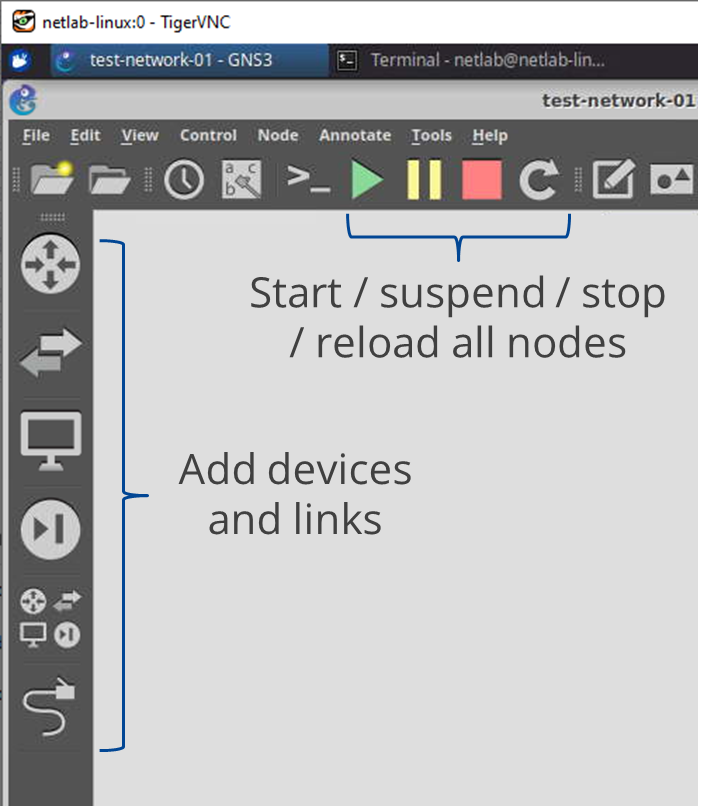
You can add various devices like network switches and hosts, as well as links between them from the menus on the left. After adding the devices, you can control their state using the controls at the top as outlined in the figure.
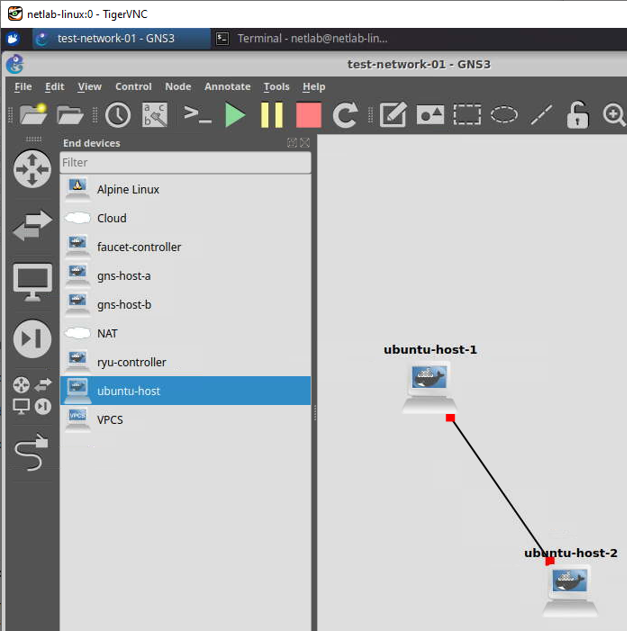
Try to create a minimal topology that consists of two dierctly connected hosts by dragging instances of the ubuntu-host onto the main panel, and then interconnecting their eth0 interfaces by consecutively clicking on the Add a link button and the two hosts. The result should look as follows.
By starting all devices using the green button at the top, the respective containers are launched. Once they are running, you can access their terminal by double-clicking the respective device in the topology.
If you close the terminal of a container, the container itself will turn off and you will have to turn it back on by right-clicking the device and pressing start. Beware: containers are stateless by design, so restarting the container will also lead to a complete loss of any files and configuration changes on it.
Lab Exercises
Please read each exercise entirely before starting to solve it.
Remember you should deliver a report after the networking module is finished. It should include the main commands and configurations necessary to complete each exercise. Do not forget to take notes while solving the exercises so you do not have to repeat them.
Quick Overview of IP Addresses
By now you've already seen that IP addresses are an important part of the Internet and computer networks in general. Before looking into more complicated setups, complete the following tasks and remember to include them in your report.
- Start by finding the IP address of
ntnu.no. You can use thehostcommand for this.
Note that the containers within your GNS3 network are not connected to the Internet. Hence, use the host command either on your local machine or in a terminal window on your lab VM.
- Convert the IP address you found to binary (you can use external tools!).
- How many bytes does this IP address contain?
- How many bits are there between each point (full stop) in the address 192.168.0.14?
Start your report now and keep updating it as you go! It doesn't have to look pretty but if you keep everything now (screenshots, notes, ...) you don't have to repeat it later.
Networking with Two Computers
The main goal of this exercise is to get familiar with basic network configuration commands using the simple two-host network topology we created earlier.
Configuring the Network Interfaces
On ubuntu-host-1
Try the following steps
- Using the command
ip addr show dev eth0find out your current IP address, if any, oneth0 - Type
ip addr helpto see all the available options - Let's now remove any unwanted address or routes on
eth0with the commandip addr flush dev eth0 - Add an IP address and respective mask to the interface
eth0using the commandip addr add <your_chosen_ip_here>/<chosen_mask> dev eth0 - Using the command
ip a s eth0(same as in step 1 but shorter) to verify your IP address. It should be the one you have just set. - Use the command
ip link set up dev eth0to "turn on" the interface, in case it is down.
On ubuntu-host-2
Repeat the configurations above, paying attention to the different interface notation and assigning a new IP address.
- Remove any address/route on the interface
eth0. - Add a different IP address and mask to the interface
eth0such that it is in the same subnet aseth0on the first host. - Use the command
ip l s up dev eth0to set the interface to "UP". - How many addresses does the subnet you chose contain?
Remember that one IP address can only be used by a single interface in the same network! It should be unique.
The size of the subnet depends on the number of bits used on the corresponding mask.
Spoiler alert! Before clicking the box below, try to solve the exercise on your own, but of course you are free to check it out.
You can use any private IP address in the ranges:
- 10.0.0.0/8
- 172.16.0.0/12
- 192.168.0.0/16
Note: you can't use the first nor the last IP address of a network/subnet. So, for example, for the network 10.12.1.0/24 you cannot use the addresses 10.12.1.0 nor 10.12.1.255 (remember that /24 corresponds to an 8 bit mask or 255.255.255.0).
An example of a pair of IP addresses and masks could be "10.100.2.1/30" and "10.100.2.2/30".
Remember: you need to have "root" privileges in order to change/add an IP address. For the containers in the GNS3 environment, this is always the case as indicated by the command prompt starting with the # sign as opposed to the $ sign you see for instance as the netlab user on the host VM.
Verifying Your Configuration
After configuring the two hosts, continue with the following steps.
- On one of the hosts, use the command
ip routeto see the routing table. For now, just report the entry you see. We will dive deeper into the exact meaning of it in a later unit. - Verify that both nodes have connectivity with the
pingcommand. First, byping-ing ubuntu-host-2's IP address from ubuntu-host-1 and afterwards ubuntu-host-1's IP address from ubuntu-host-2.
The basic syntax of the ping command is ping <destination_ip_address>, e.g., ping 10.0.0.5. The output contains per-packet statistics if there is a route to the target network and the target address can be reached or an error message otherwise. You can use Ctrl+C to stop sending packets.
- You can also capture packets that traverse your network using the Wireshark tool we've seen during the lecture. To do so, right-click the link, hit "start capture", make sure that "Start the capture visualization program" is checked, and confirm with "OK".
- Run
pingagain and observe what kind of packets / messages are exchanged. Do some research to figure out the broad use of the involved protocols (few sentences in your report are sufficient). You can also include a screenshot of your Wireshark window in the report if it helps with your explanations.
Experimenting with Masks
The goal of this task is to get more comfortable with subnets and masks and see how they work in practice. If you have questions about why something happens, or does not happen, feel free to ask!
On ubuntu-host-1
- Change the IP address of
eth0to10.10.10.30using the mask255.255.255.192. - Verify that you still have connectivity and discuss why or why not.
You may lose connectivity at this point depending on the IP addresses you have previously chosen.
On ubuntu-host-2
Make the following changes.
- Change the IP address of
eth0to10.10.10.5using the mask255.255.255.192. - Check for changes in connectivity between the two hosts. Can one still
pingthe other? - Using the same IP address, change the mask to
/30. - Check for changes in connectivity between the two hosts.
- Using the same IP address, what is the smallest subnet size, and corresponding mask, that you can use to maintain connectivity between the two hosts? Why?
It may be helpful to convert the addresses of both hosts to binary first. Also, feel free to consult online tools such as the IP calculator.
Don't forget to make the changes on both hosts when experimenting with different subnet sizes.
You don't have to include all the commands you needed to type, it is enough to discuss/explain the changes in connectivity and the choices you made.
Optional Exercises
Introducing IPv6
Using the same topology, use IPv6 addresses and experiment with
- the
pingcommand - different subnets
Note that some commands require additional arguments to handle IPv6 (check their documentation).